Help Center ▸ Integrations ▸ Zapier In this guide, you’ll learn how to use Zapier to keep your WhatConverts leads up to date with your CRM.
Important: Please read our guide on sending leads to your CRM using Zapier before continuing.
Step 1: Create Your Zap
1Log in to your Zapier account.
2On your dashboard, click the “Create” button to start a new Zap.
Step 2: Set up the Trigger
Select the trigger and choose the following options:
1App: Select your CRM (e.g., HubSpot, Salesforce, Zoho)
2Trigger Event: Updated Contact
3Connect Your CRM Account
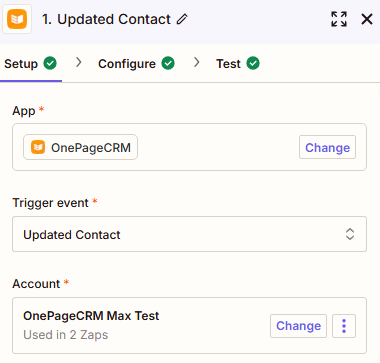
4Click Continue.
Step 3: Select Contact Status
1Select the contact status you’d like to use as a trigger for your Zap.
For this example, set the “Filter by Contact Status” field to "Customer".
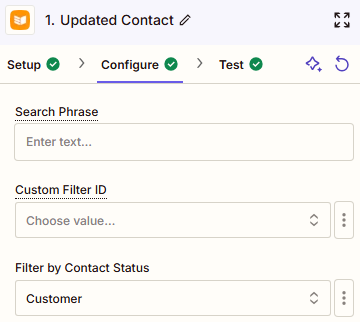
Important: Depending on the CRM, your Zap may use a different Contact Status field.
Step 4: Test Your Trigger
1Click Continue and then Test Trigger.
Zapier will look for recently updated contacts. If no contact is found:
- Go into your CRM and manually update a contact’s status to “Customer”.
- Return to Zapier and test again.
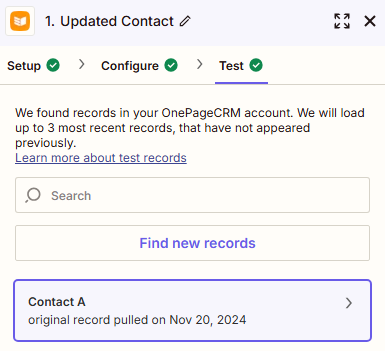
2After Zapier finds a contact, click “Continue with selected record”.
Now that your trigger is in place, it’s time to tell Zapier what action to perform when a Contact in your CRM is updated.
Step 5: Set up the Action
Select the action and choose the following options:
1App: WhatConverts
2Action Event: Find Lead
3Connect Your WhatConverts Account
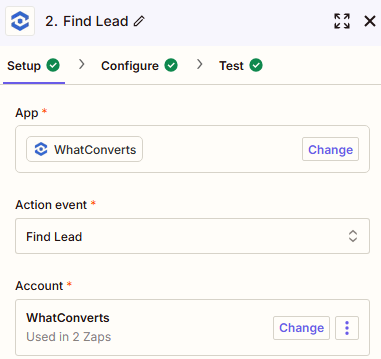
4Click Continue
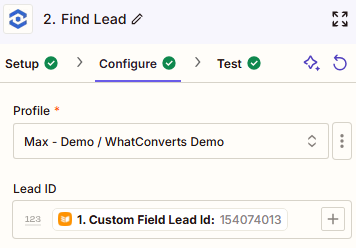
Step 6: Map the Lead ID
1Profile: Select your WhatConverts profile.
2Lead ID: Map the Lead ID from your CRM.
Important: If you followed our guide on sending leads to your CRM using Zapier, you should have a Lead ID.
Step 7: Find the Lead in WhatConverts
1Click Continue and Test Step to find the lead in WhatConverts.

2After Zapier finds the lead, click Continue.
Now that your action is in place to find the lead, you need to set up another action to update it.
Step 8: Set Up the Second Action
Select the action and choose the following options:
1App: WhatConverts
2Action Event: Update Lead
3Connect Your WhatConverts Account
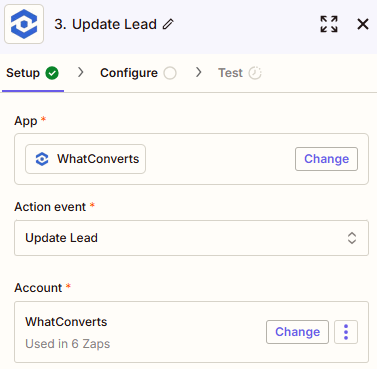
4Click Continue
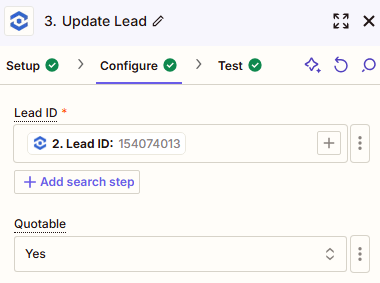
Step 9: Map Your Fields
1Lead ID: Map the Lead ID from your CRM.
Important: If you can’t find the Lead ID, click the three-dot icon next to its field and select “Custom”. You can then search for the Lead ID.
2Map any other fields you want to update.
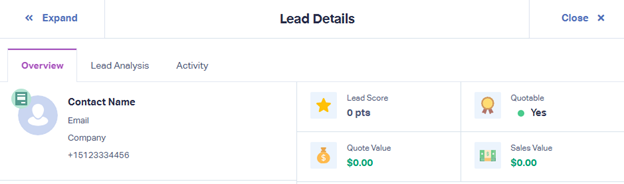
For this example, select the "Quotable" field and set it to “Yes”.
Step 10: Update Your Lead
1Click Continue and Test Step to update the lead in WhatConverts.
2Log in to your WhatConverts account and confirm that the lead was updated.
Step 11: Publish Your Zap
Once your test is successful and everything looks good:
1Click "Publish" to activate your Zap.
2Zapier will now automatically update your WhatConverts leads whenever they are updated in your CRM.
If you have any questions, please contact WhatConverts Support or email support@whatconverts.com
In this guide, you’ll learn how to use Zapier to keep your WhatConverts leads up to date with your CRM.
Important: Please read our guide on sending leads to your CRM using Zapier before continuing.
Step 1: Create Your Zap
1Log in to your Zapier account.
2On your dashboard, click the “Create” button to start a new Zap.
Step 2: Set up the Trigger
Select the trigger and choose the following options:
1App: Select your CRM (e.g., HubSpot, Salesforce, Zoho)
2Trigger Event: Updated Contact
3Connect Your CRM Account
4Click Continue.
Step 3: Select Contact Status
1Select the contact status you’d like to use as a trigger for your Zap.
For this example, set the “Filter by Contact Status” field to "Customer".
Important: Depending on the CRM, your Zap may use a different Contact Status field.
Step 4: Test Your Trigger
1Click Continue and then Test Trigger.
Zapier will look for recently updated contacts. If no contact is found:
- Go into your CRM and manually update a contact’s status to “Customer”.
- Return to Zapier and test again.
2After Zapier finds a contact, click “Continue with selected record”.
Now that your trigger is in place, it’s time to tell Zapier what action to perform when a Contact in your CRM is updated.
Step 5: Set up the Action
Select the action and choose the following options:
1App: WhatConverts
2Action Event: Find Lead
3Connect Your WhatConverts Account
4Click Continue
Step 6: Map the Lead ID
1Profile: Select your WhatConverts profile.
2Lead ID: Map the Lead ID from your CRM.
Important: If you followed our guide on sending leads to your CRM using Zapier, you should have a Lead ID.
Step 7: Find the Lead in WhatConverts
1Click Continue and Test Step to find the lead in WhatConverts.
2After Zapier finds the lead, click Continue.
Now that your action is in place to find the lead, you need to set up another action to update it.
Step 8: Set Up the Second Action
Select the action and choose the following options:
1App: WhatConverts
2Action Event: Update Lead
3Connect Your WhatConverts Account
4Click Continue
Step 9: Map Your Fields
1Lead ID: Map the Lead ID from your CRM.
Important: If you can’t find the Lead ID, click the three-dot icon next to its field and select “Custom”. You can then search for the Lead ID.
2Map any other fields you want to update.
For this example, select the "Quotable" field and set it to “Yes”.
Step 10: Update Your Lead
1Click Continue and Test Step to update the lead in WhatConverts.
2Log in to your WhatConverts account and confirm that the lead was updated.
Step 11: Publish Your Zap
Once your test is successful and everything looks good:
1Click "Publish" to activate your Zap.
2Zapier will now automatically update your WhatConverts leads whenever they are updated in your CRM.
If you have any questions, please contact WhatConverts Support or email support@whatconverts.com
Get a FREE presentation of WhatConverts
One of our marketing experts will give you a full presentation of how WhatConverts can help you grow your business.
Schedule a Demo 

 Call Tracking
 Form Tracking
 Chat Tracking
 eCommerce
 Agencies
 Marketers
 Franchises
 Businesses
 Hospitality
 Finance and Insurance
 Real Estate
 Automotive
 Health and Wellness
 Doctors and Medical
 Dental
 Plastic Surgeons
 Education
 HVAC and Plumbing
 Lawyers
 Manufacturing
 AgencyAnalytics
 Pipedrive
 Calendly
 Google Ads
 VWO
VWO Bing Ads
 Formsite
 SimpleTexting
 Formstack
 Facebook Ads
 Landingi
 Intercom
 Over 1000 integrations
 Help Center
 Blog
Blog API for Developers
 Webinars
 Schedule a Demo
 System Status 100%


